After creating your AWS account, you can access it to provision resources or manage cloud services in the different ways AWS provides. First, you can access it through the AWS Management Console, which is the user’s graphical interface to access AWS Cloud Services. Secondly, you can access it through the AWS SDKs (Software Development Kits). These developer tools allow you to develop, build, deploy, or manage your applications in your AWS account. Thirdly, an AWS account can be accessed through a Command-Line Interface – AWS CLI.
Similarly, this is the non-graphical user interface where interaction with the system is through text commands. Thus, the commands are written on a terminal interface, facilitating communication with your cloud resources and services. As a result, AWS has created a readily available Command Line Interface (AWS CLI) for Windows users.
Introduction
In the realm of cloud computing, efficiency and automation are key. Amazon Web Services (AWS) Command Line Interface (CLI) offers a streamlined way to locally interact with your AWS resources and(or) services directly from the command line. This empowers users like you and me to manage their cloud infrastructure easily.
Whether you are a seasoned developer or just dipping your toes into the world of cloud computing, mastering the AWS CLI opens up a world of possibilities for accessing, building, and deploying resources on your AWS Cloud Services account.
In this guide, I will help you unlock the power of cloud management. Following this tutorial, we will download and install AWS CLI on your Windows computer. Therefore, it is a set of simple steps curated to meet your installation needs.
Before diving into the installation process, let’s briefly explore why you might choose to use the AWS CLI. In this tutorial, I’ve summarized four main reasons and benefits for using the AWS CLI.
4 Top Benefits or Reasons Why You Must Use AWS CLI?
- Efficiency: Performing tasks via the command line can often be faster and more efficient than using a graphical interface.
- Automation: The AWS CLI allows you to reduce or eliminate repetition by automating daily tasks. Therefore, it saves you time and worries about making human errors.
- Flexibility: The AWS CLI tool gives you access to all AWS services and features, giving you unparalleled flexibility in managing your cloud infrastructure.
- Scalability: The AWS CLI scales to meet your needs, whether managing a small-scale deployment or a sprawling enterprise infrastructure.
Now that we’ve highlighted the benefits, let’s begin the installation process.
Downloading and Installing AWS CLI on Windows
There are three simple steps to download, install, and verify the version of the AWS CLI installed. Follow them, and you will be done in a few minutes.
Step 1: Download the AWS CLI Installer.
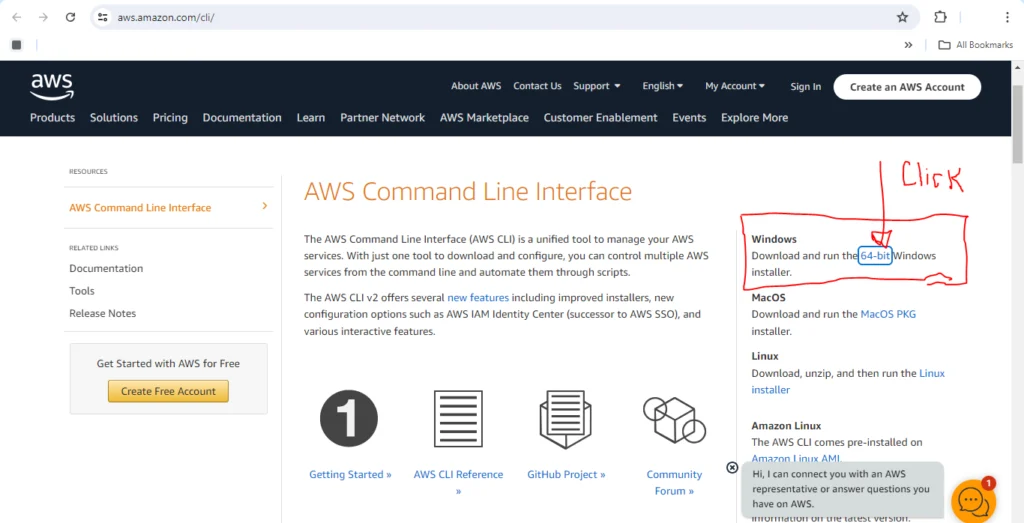
There are two ways to download the CLI installer for Windows. First, to save you time, I searched for the best and most reliable source and provided you with direct access to the installer. Therefore, you can confidently click the link below to download the installer because it is verified. You will be taken to the official AWS CLI documentation page: https://aws.amazon.com/cli/. The Windows installer is the first one on the list on the right side. You need to install the 64-bit version; therefore, click the “64-bit” link in blue.
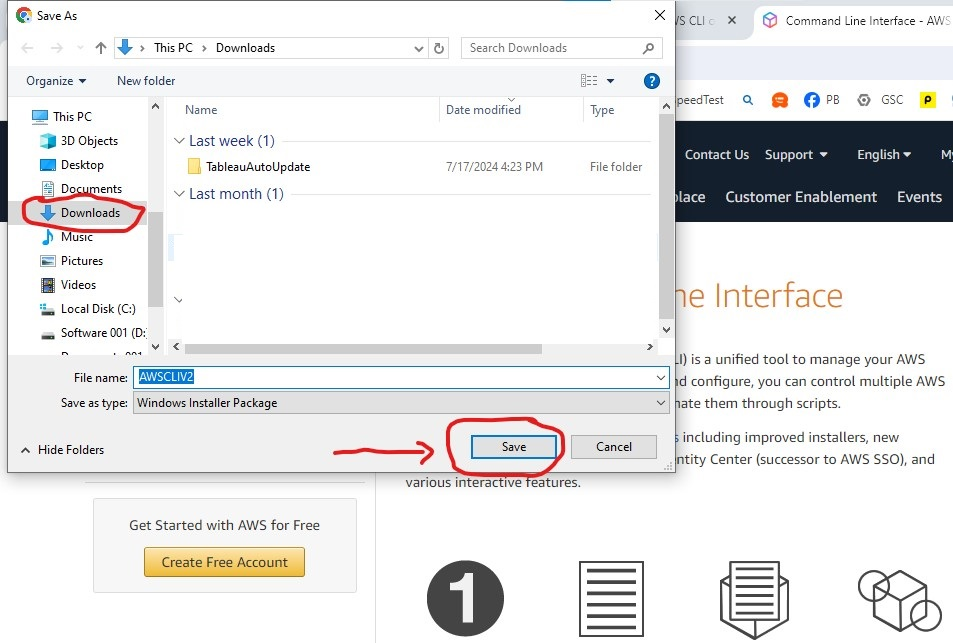
Saving the AWS CLI Installer Locally on Windows
After clicking the 64-bit link, you will be prompted to save as the file on your computer. You will be prompted to save it in the downloads folder by default. Keep the default file name and click save.
Immediately after the downloading process is complete, a notification will appear on the Google Chrome downloads icon.
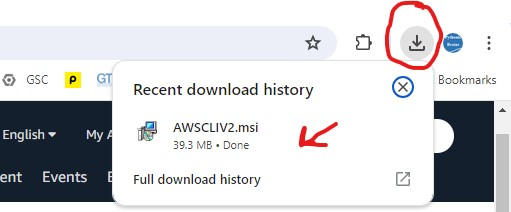
However, if it does not pop up or the notification window disappears before you see it, navigate to the downloads folder.
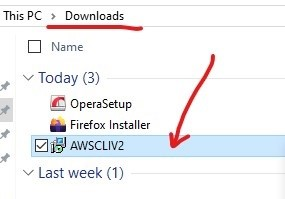
How to Change the Download Storage Location Folder.
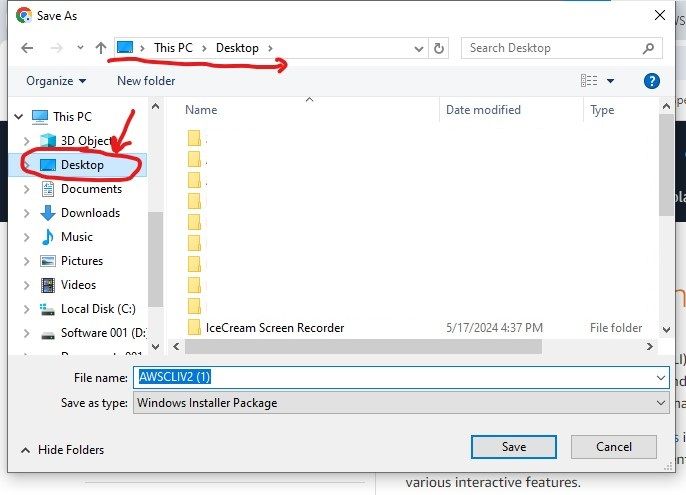
If you wish to change the storage location on your Windows computer, you can use the “Save As” dialogue panel. To do this, click one of the available locations on the left side menu. For example, I selected Desktop to change from Downloads to Desktop.
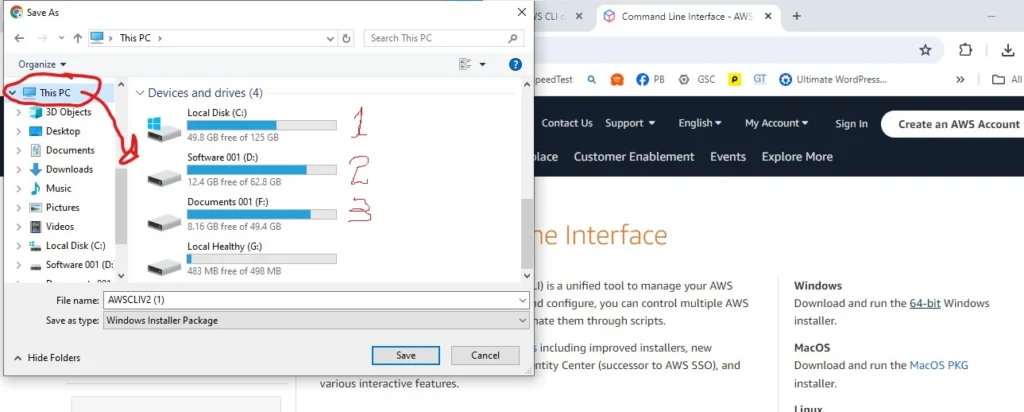
Additionally, if you want to access more storage locations on your hard drive, click on the “This PC” menu. Next, scroll past the system folders to see the primary storage locations on your Windows computer hard drive. For example, the screenshot below shows three storage locations on my hard drive.
Pro Tips
Double-click on any available storage to open it and store your file. If your hard drive has not been partitioned, you will only see one storage location when you open it.
Therefore, you do not have to worry about it. Nonetheless, you can choose among the system folders such as 3D Objects, Desktop, Documents, Downloads, Music, Pictures, and Videos.
Before we embark on step 2 of the downloading processing, let us look at an alternative way to download the AWS CLI installer.
Alternative Downloading Method: How to Download AWS CLI Directly on your browser, such as Mozilla and Opera Mini
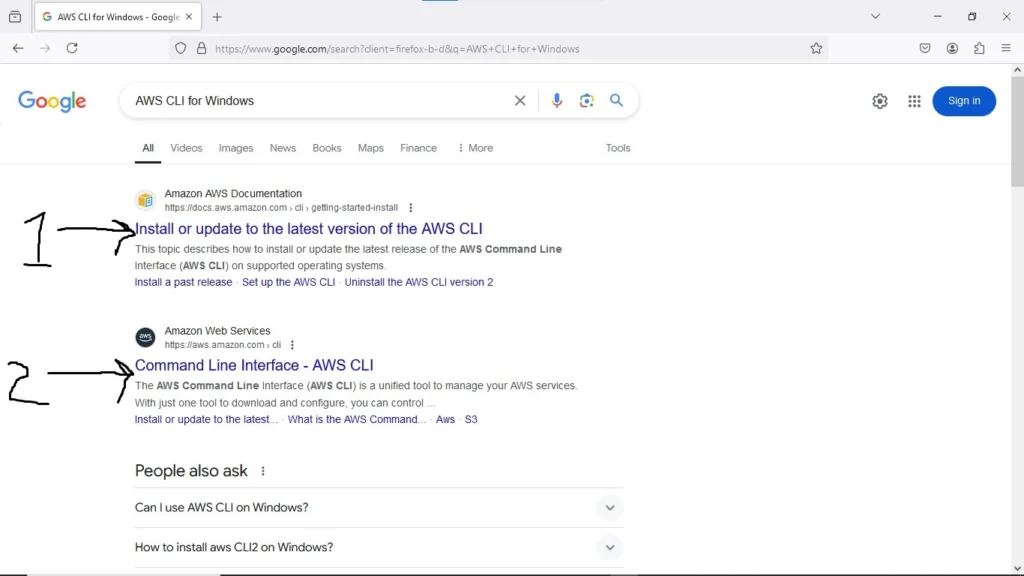
If you are not interested in opening the provided link or it does not work on your current device, there is another way to do it. The second method is to use your favorite browser on your Windows machine to search for it online and follow the installation procedures. For example, my favorite browser is Google Chrome. I got this first search result by typing “AWS CLI for Window” in the search bar and pressing the enter button on my keyboard.
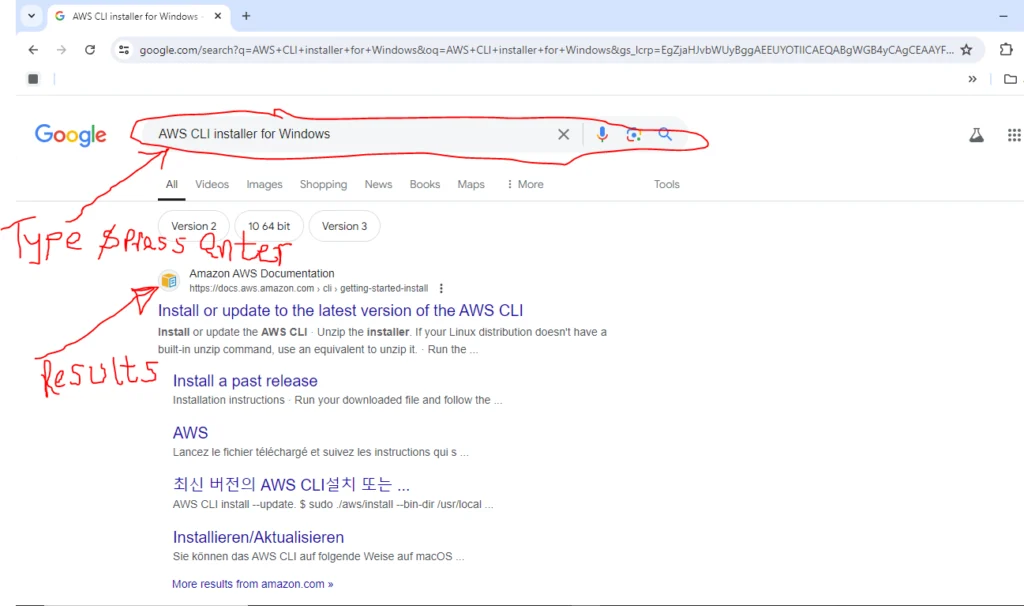
On the same note, you will receive similar results if you perform the exact search in your browser. Then, you can download it from one of the sources and install the AWS CLI. For example, my search results from the Mozilla Firefox browser were as follows.
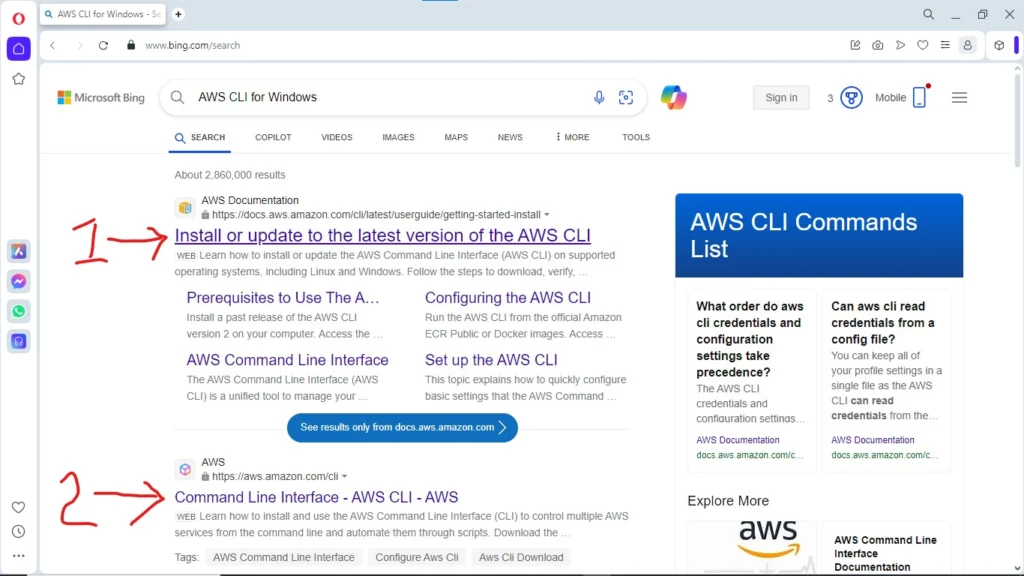
Similarly, an internet search using the OperaMini browser yielded the same search results. See the screenshot below as captured in realtime.
Upon opening the first search result on any browser, you will land on this AWS Documentation page, as shown in the screenshot below. Every procedure described in it is correct. However, reading and choosing the correct download button or link will take time.
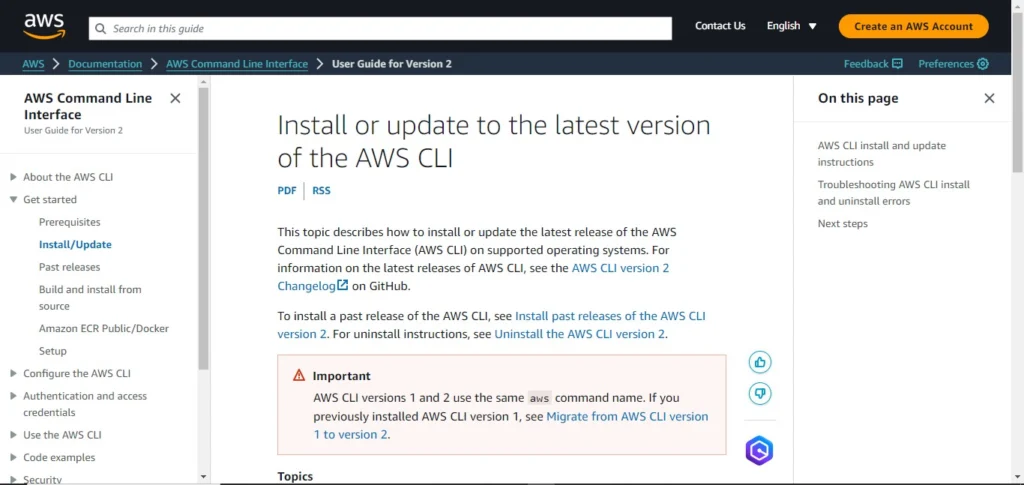
As you can see from above, the results are not specific, so you have to choose, unlike in method one, where I direct you to the exact installer version and download link.
Pro Tip Recommendation
Follow the first method. It directly opens the Official AWS downloads page, ensuring a reliable and secure file download. I tested it before writing this guide.
Step 2: Run the Installer
Navigate to the local storage location in your computer where you saved the installer. Next, double-click to run it. Then, follow the on-screen instructions to complete the installation process. For this tutorial, I opened the installer from the downloads storage location by clicking on it.
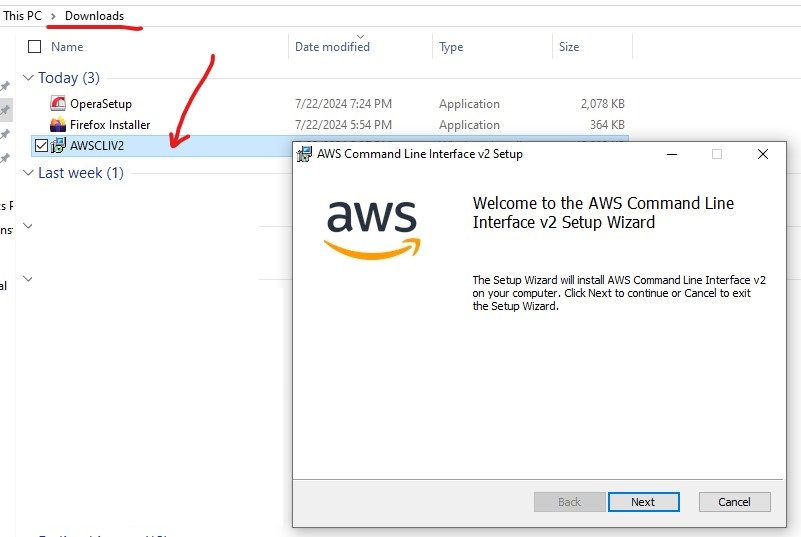
Then, as highlighted above, I clicked the “Next” button on the setup installation wizard. Next, I accepted the end-user agreement license for the wizard to proceed.
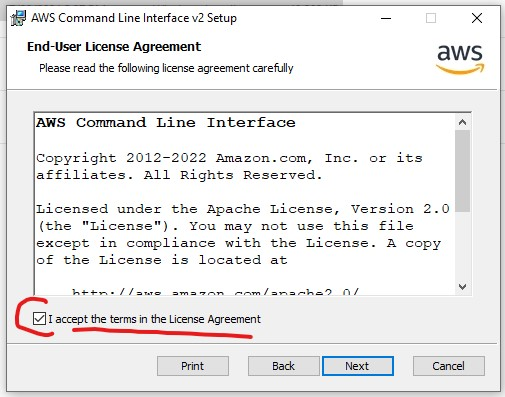
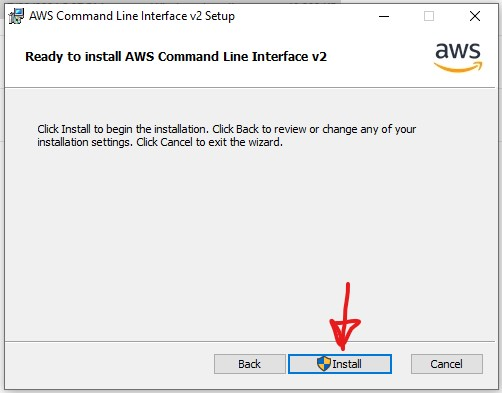
Select the box before the agreement statement and click next. The wizard will open the setup installation panel within a moment. Click Install at the bottom of the installation panel.
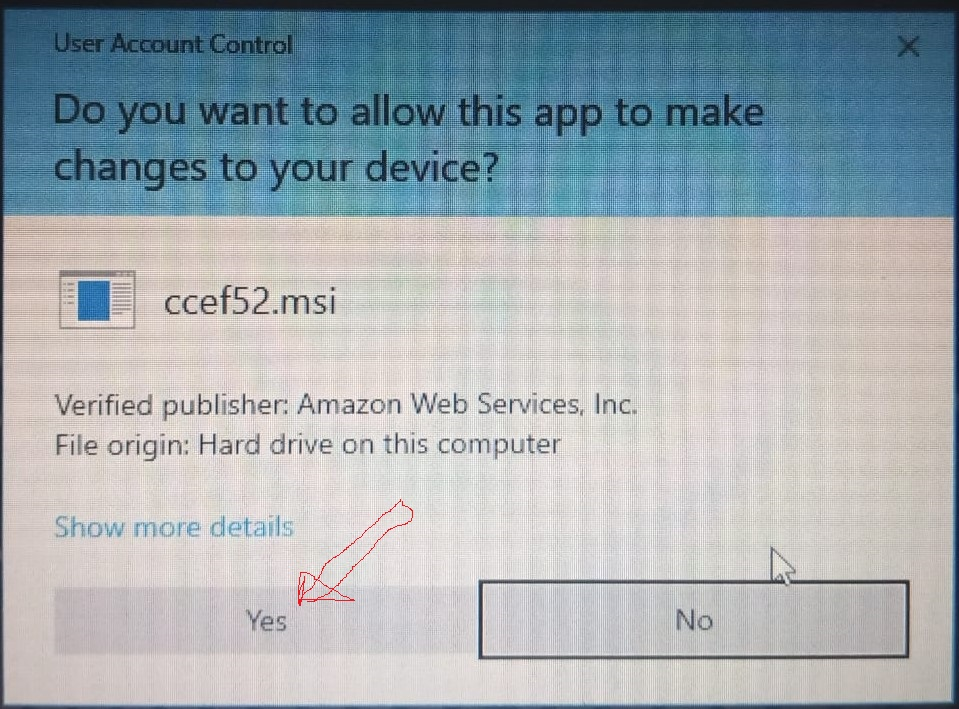
Next, when prompted by Microsoft Windows user account control to allow changes, click Yes to proceed.
After that, the installation wizard will ask you to choose the default installation location or a custom installation. Leave the default and click next. By default, the installer will install it in the “C:\Program Files\Amazon\AWSCLI” directory.
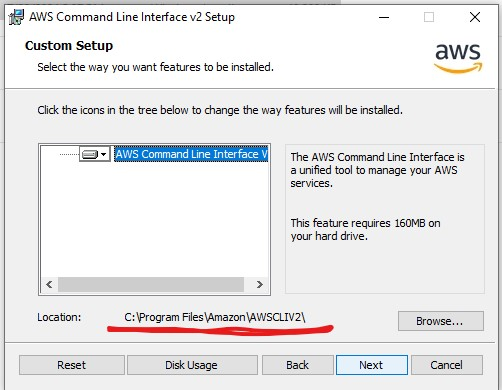
Then click next to install and wait for the installation process to complete.
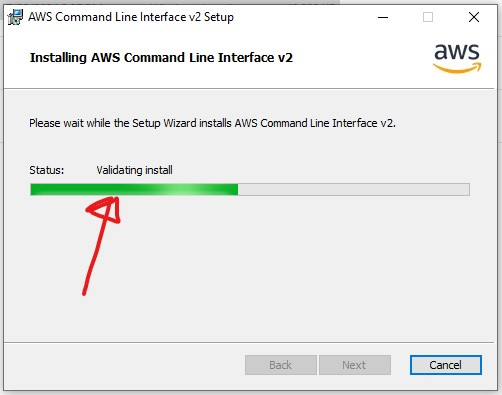
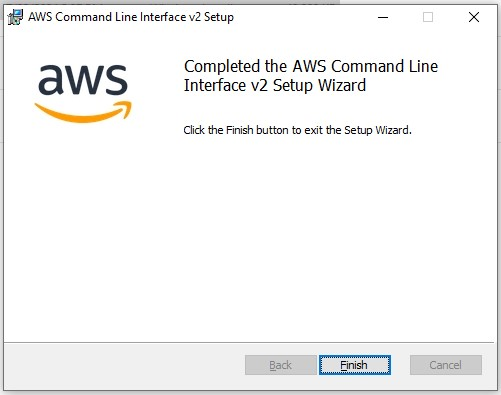
The process takes a short while. When the setup is done, the following panel will appear, asking you to finish the installation.
Step 3: Verify the Installation
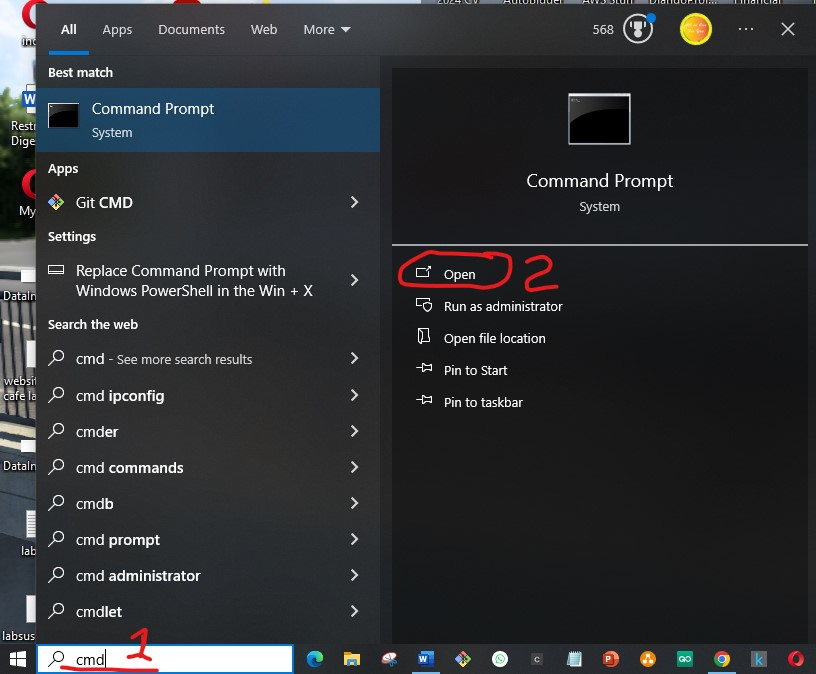
Next, use the Windows command prompt terminal to verify that the Command Line Interface has been installed correctly. To open the command prompt (cmd), go to the Windows search bar on your taskbar and type cmd. From the popup menu, click open.
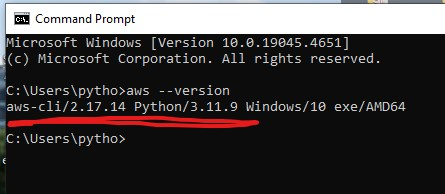
Once the cmd opens, type the command aws –version and enter.
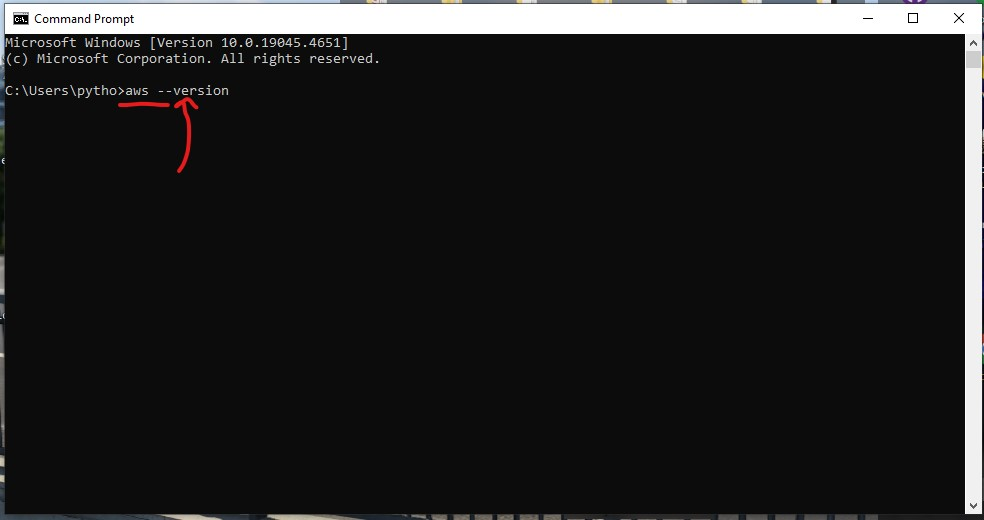
If the installation was successful, you should see the version of the CLI displayed in the command prompt interface as follows.
Conclusion
In conclusion, mastering the AWS CLI is a valuable skill for anyone working with AWS cloud services. By following the steps outlined in this guide, you can quickly download and install the AWS Command Line Interface on your Windows machine, enabling you to effectively manage your cloud services and resources using the command line.
Whether you’re deploying new EC2 instances, managing S3 buckets, or automating complex workflows, the AWS CLI puts the power of AWS at your fingertips. Start exploring the possibilities today and unlock the full potential of cloud management with AWS CLI.

